
Make Your Own Sweater Covered Pumpkins
DIY Pumpkin Sweaters
This was such a fun project! This post is jam packed full of different techniques!
I love the look of the sweater covered pumpkins for my fall decor. I had a sweater that I thought would be perfect to make some pumpkins out of.
Picking Pumpkins
I picked up two Dollar Tree foam pumpkins. I already had one in my stash but never used it because it looked so cheap. I purchased a black glittery one at the Good Will for $1.49 and a nice carvable one that someone colored all over for $1.00. It was an excellent assortment, to begin with.
I Didn’t want the orange to show through. So I gave them a quick spray with white spray paint.
Natural Dye from Onion Skins
I didn’t want all of the pumpkins to be the same color. So, I decided to dye some of the fabric pieces brown. But, I didn’t want to spend any money on dye.
I went to our local Nugget Market and asked the produce guy if I could have the onion skins from the bottom of the box. He didn’t have to think about it, and I didn’t have to explain myself. He immediately said, “Yes! Help yourself!”
I was able to collect a whole brown lunch bag full. I put them in a pot of boiling water for 30 minutes. Then, I added the sweater pieces and let them simmer for an hour. Then, I let them cool.
The Sweater
I had five pumpkins to cover. I used the sleeves for four of them. But, I really wanted to use the cable knit and buttons on the front of the sweater for one of them. So I just sewed the front closed and stitched the back closed to sort of form a sleeve.
Then, I cut holes in the tops and bottoms of the pumpkins and glued the sweaters on.
The Ribs of The Pumpkin
I used some old jute/twine that Had in my stash. I glued them at the top of the pumpkin and followed the rib around to the other side. I glued the other end to the top of the pumpkin.
The Leaves
I used some old jute/twine that Had in my stash. I glued them at the top of the pumpkin and followed the rib around to the other side. I glued the other end to the top of the pumpkin.
The Tendrils
I purchased a package of wired jute from the Dollar Tree. One package was the perfect amount.
I just curled them around a pen and added them with hot glue.
The Stems
While the onion dyed fabric pieces were cooling, I got to work on the stems.
I had this clay in my stash. I knew I had it a long time. But, I was surprised that it said 2005 on the package! I’m not a packrat, I’m not, I’m not, I’m not! Also, do you know how many houses I’ve lived in since 2005? Seven! I have packed and moved that clay seven times!
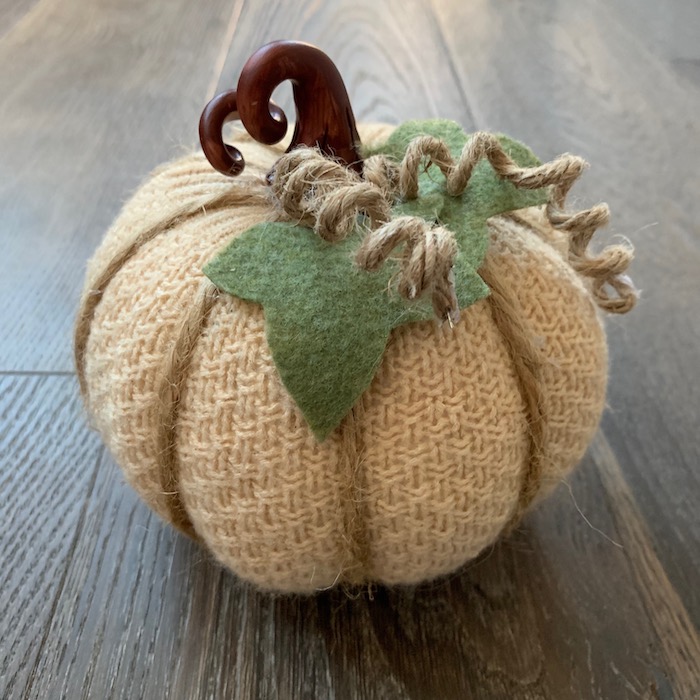
Anyway, I used the clay to make cute new stems for the pumpkins! Mrs. Wallace, my ceramics teacher at Casa Roble High School, would be proud. I think they were the icing on the cake! I love them!
The Finishing Touches
After gluing the fabric onto the pumpkins, I added the twine around the ribs. Then, glued on the leaves and tendrils. Finally, I glued on the stems. They look adorable!!!
Some of the links in this post are affiliate links. This means if you click on the link and purchase the item, I will receive an affiliate commission at no extra cost to you. All opinions remain my own. Please read my full disclosure for more info.
SUPPLIES
- Foam Pumpkins
- White Spray Paint
- Sweater(s)
- Jute or Twine
- Polyform Clay
- Wired Jute
- Green Felt
- Hot Glue Sticks
- Brown Acrylic Paint
TOOLS
- Exacto Knife
- Scissors
- Hot Glue Gun
- Sewing Machine (If you are need to piece the fabric together. Or, you can sew by hand.)
- Small Paint Brush
HOW TO VIDEO


BLOOPERS
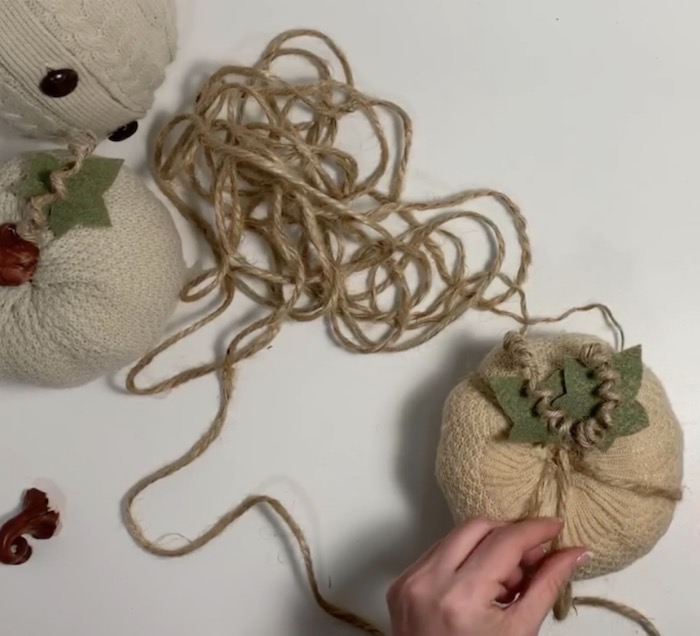
I forgot to add the twine around the pumpkins to form the ribs. I could have left them without it. But I thought it would be cuter if I added it. So, I took off the stems and some leaves and tendrils. I added the twine and then replaced anything that I removed.