
Some of the links in this post are affiliate links. This means if you click on the link and purchase the item, I will receive an affiliate commission at no extra cost to you. All opinions remain my own. Please read my full disclosure for more info.
How to use vinyl as a template for DIY Screen Printing.
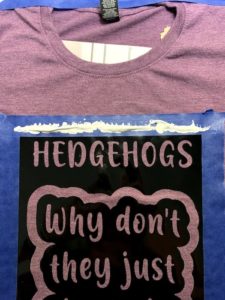
I tried several times to cut my design out of freezer paper. I even sharpened my cricket blade (see my post about foil). Alas, it didn’t work. So I cut my design out of vinyl. I used my transfer tape and placed the stencil on my shirt. I used the blue painter’s tape, so I didn’t get the ink on the shirt.
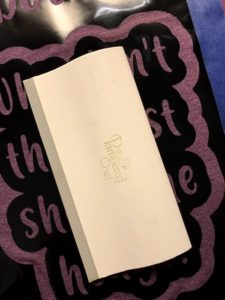
For this DIY screen printing, I used a paint stick and dribbled some Speedball Ink onto the tape. I didn’t have a squeegee, so guys, I used the scraper thing from Pampered Chef. LOL, it worked for the most part.
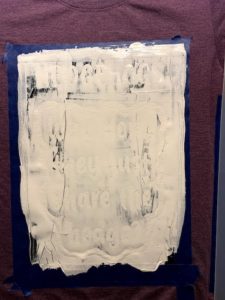
I dragged the paint down the design with that scraper thing. I let it dry overnight with the stencil still on.
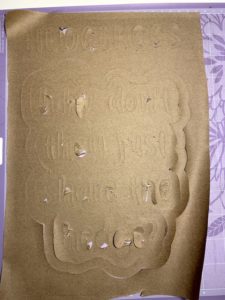
The next day I took the stencil off and noticed that it had bled through at the very bottom. Since it was just a pajama shirt, I decided I was going to leave it as is and not mess with it. I placed my Teflon sheet over it and just ironed it for a couple of minutes, making sure that the iron didn’t remain still too long. The iron sets the ink so that you can wash it. I thought it turned out so cute!
SUPPLIES
- T-shirt
- Vinyl cut out
- Vinyl
- Speedball Ink
- Blue painters tape [I got mine at the Dollar Tree.]
- Cardboard to place inside the shirt so that it doesn’t bleed through to the backside.

TOOLS
HOW TO
1. Cut your design out of vinyl or freezer paper. (If using freezer paper, make sure you iron it on first.) Place on t-shirt.
TIP: Fold your t-shirt in half, horizontally, then iron crease. Fold your t-shirt in half again, vertically, and iron the crease. Fold your design in half and match up the lines on your t-shirt.

2. Tape around the edges of the design to protect the shirt from the ink. I purchased a roll of blue painter’s tape from the dollar tree.
3. Place cardboard inside of the shirt to protect it from any ink that may leak through.
4. Dabble some ink onto the top of the design.
5. You’ll need a squeegee to drag the ink down the stencil. I didn’t have one, so I used this Pampered Chef scraper tool. (I don’t recommend it.) You could also use a paintbrush, but the ink will not be smooth.
6. Using your squeegee, drag the paint down the stencil.
7. Let the ink dry. If the stencil is small enough to take off while it’s damp, I would remove it then. But, this one was so big, I was afraid of messing up the design while trying to peel this off.
8. Carefully remove the stencil.

9. Cover your design with parchment paper or some sort of protective sheet. I used a teflon sheet. Set your iron to the cotton setting (or whatever material your item is made of). Iron over the design, being mindful to not leave the iron in one spot for too long.

10. All done! Look how cute! And, she loved it!

BLOOPERS
I wish I had a squeegee. I’m going to have to get one for next time. You could use a stencil brush, but I wanted the ink to be even. The edges of the Pampered Chef scraper thing made a line through the design, so I don’t think I’ll use it again.
This was my first attempt at trying to cut freezer paper using my ancient Cricut Expression. This machine is over 10 years old. I really need to get a new Cricut.