
Some of the links in this post are affiliate links. This means if you click on the link and purchase the item, I will receive an affiliate commission at no extra cost to you. All opinions remain my own. Please read my full disclosure for more info.
DIY Tufted Desk Chair Makeover
I needed a new desk chair for my craft room. A task chair to be more specific. I didn’t want a chair with arms so that I can spin around to all of my different workstations.
I found a chair on Facebook Marketplace for free. It was nice how it was. But the leather was peeling, and it looked it bit weathered. Also, I wanted a white chair to match my craft room furniture.
I decided I would give this chair a makeover. But, this would be the first time that I would try tufting and using upholstery tack strip. I have made slipcovers for chairs and reupholstered simple chair bottoms. But, this was a lot different than that.
I’m going to provide step-by-step instructions below, but keep in mind; this was my first time doing this. I just want to show how I did it to hopefully inspire you to try something out of your comfort zone.
SUPPLIES
- Upholstery Needles
- Waxed Button Thread
- Heavy Duty Thread
- 3/4″ Cover Buttons
- Vinyl Sewing Machine Needles
- 2 Cans of Semi-Gloss White Rustoleum Spray Paint
- 1 1/2 yards of Sailing Vinyl
- Poster Board
- Spray Glue
- 2″ inch foam (long and wide enough for seatback and seat bottom)
- 1/2″ inch foam
- Batting
- Staple Gun Staples
- 1/4″
- 3/8″
- 1/2″

TOOLS
- Pliers
- Small Flathead Screwdriver
- Power Drill
- Scissors
- Soldering Iron
- Staple Gun
HOW TO
Step 1
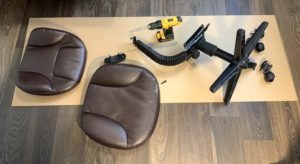
Start with disassembling your chair. I took pictures as I went along, so I would know how it was supposed to go back together.
Step 2
Paint the main part of the chair. Put tape over any place for screws so that you don’t mess up the threading.
I decided that I wanted the nuts and knobs to be white as well. So I taped off the parts I didn’t want painted and sprayed them white as well.
I let it dry between coats while I started working on the rest of the chair.

Step 3
While the rest of the chair was drying, I started removing staples from the seat bottom and back.
I saved all of the old pieces of fabric and foam so that I could use them as a template later if needed.
Step 3
Step 4
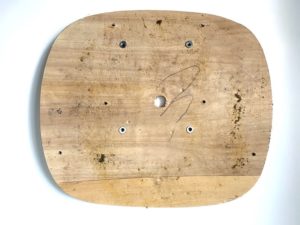
I removed everything until I got down to the bare wood.
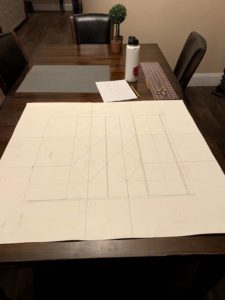
Doing this gave me a clean slate. I was able to use this seat bottom as a template. I took a piece of poster board and traced the seat onto the board.
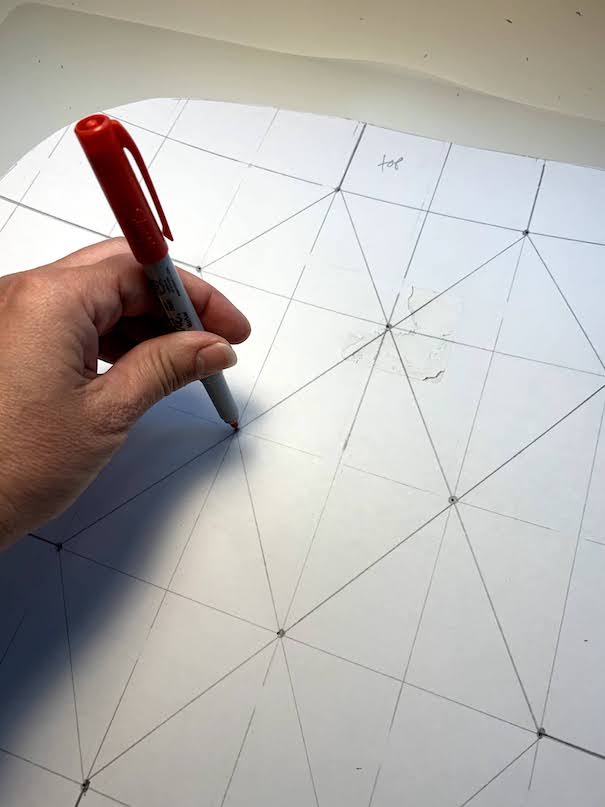
Step 5
It was much easier to draw out my design on the poster board than to try and sketch it onto the wood.
I graphed 1″ lines on the poster board to see exactly where I wanted my buttons.
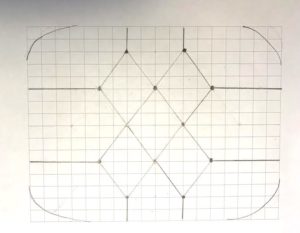
Step 6
Next, I cut it out and poked holes where all the buttons would be. This way, I could push my permanent marker through the hole to mark the wood where my buttons would go.
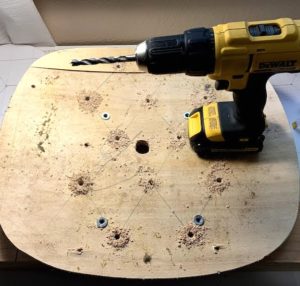
Step 7
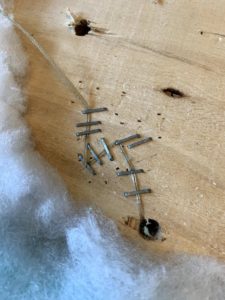
Once I had the spots marked, I drilled holes using a 3/8″ drill bit.
Note: I didn’t use the drill bit in the photo. I used a wood drill bit, but put the wrong one in for the picture.
Step 8
After drilling my holes, I glued 2″ foam to the top of the seat.
I used an electric cutting knife to cut it to the shape of my seat bottom.
Step 9
Next, I wrapped around the edges of the 2″ foam and wood with 1/2″ foam. I glued it with spray glue.
I let the glue dry for a couple of minutes and then sprayed and folded the foam’s edges onto the board.
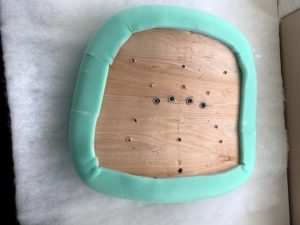
Step 10
I covered the entire top and sides with batting. I stapled it onto the bottom of the seat.
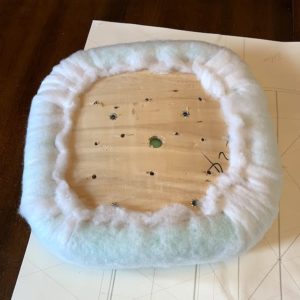
Step 11
Using an upholstery needle, stick it through the hole in the back to mark the spot for the hole on the batting. I used a permanent marker to mark where all the holes will go.
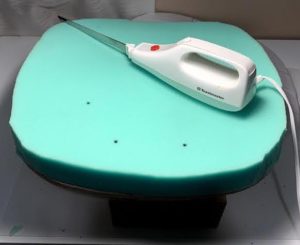
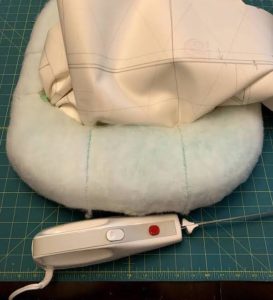
Step 12
Using a soldering iron, I melted holes in my batting and foam. The holes are approximately 1 inch in diameter, and they go all the way to the wood.
Step 13
Next, I sketched the same design that I drew onto the seat bottom, onto the back of the vinyl.
This time, I added 2″ between each button to allow for the vinyl to go down into the foam. I also gave myself 6″ around the design for it to wrap around the sides and onto the bottom
Example:
Seat bottom 24″ wide
3 buttons x 2″ vinyl = 6″ vinyl
6″ vinyl to wrap around sides and back
24″ vinyl + 6″ vinyl + 6″ vinyl = 30″ wide
Step 14
Get your covered buttons ready with a 15″ piece of waxed button thread. Loop it onto the button like in the picture.
NOTE: I will be publishing a separate “how-to” on the covered buttons.

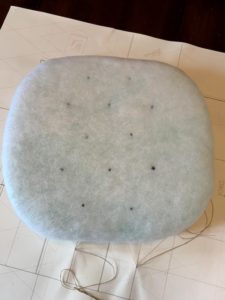
Step 15
Thread your button onto the upholstery needle.
Put slight pressure onto the front of the vinyl while looking at the design on the back. Once your needle is lined up with where the hole should be, punch it through.
Then, guide it through the matching hole in the batting and foam and out the other end. You should be able to take the needle off.
Make sure your button is all the way down in the hole. Pull the string tight and give it three staples. Pull the line in the opposite direction and give it three more staples. Finally, pull it back in the opposite direction and end it with three staples.
Move on to the next button.
Step 16
This step can be done before you begin putting the vinyl on. I forgot to do it, so I did it at this point.
I took the electric knife and made slits in the foam from the foam’s edge to the row of closest buttons. Go down about 1/2 way through the foam.
This makes a little channel for the vinyl to sit inside.
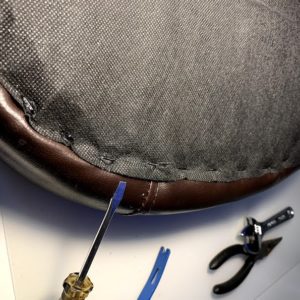
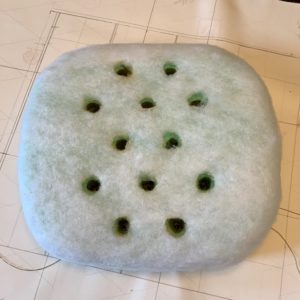
Step 17
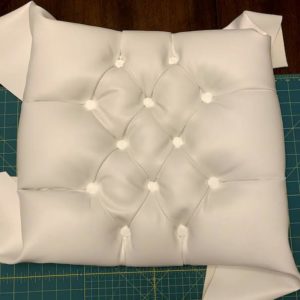
You have to shape your diamonds with your fingers as you upholster it.
This picture shows what it looks like about halfway through the process. I basically folded the extra vinyl under to shape the diamond.
Step 18
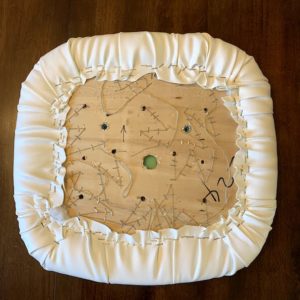
Staple the vinyl to the bottom of the seat.
NOTE: I will do a separate post on how to upholster a seat.
Step 19
I just reused the piece of fabric that was on the bottom of the seat previously.
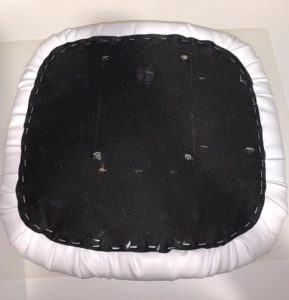
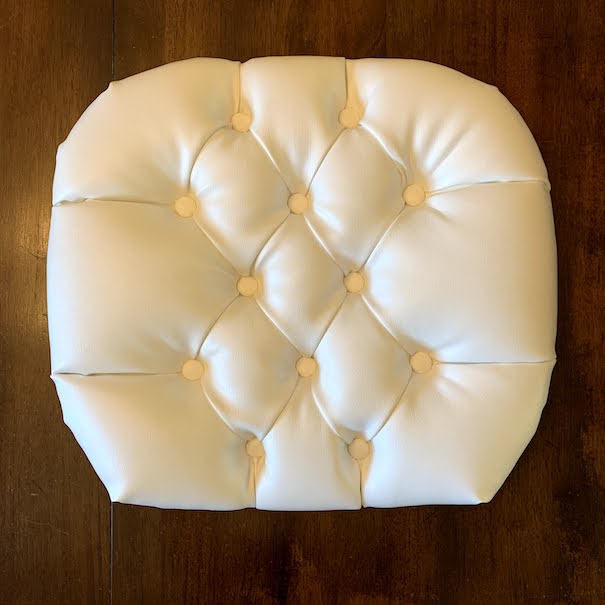
Step 20
Not bad for my first time, if I do say so myself! 🙂
Step 21
Reassemble the seat.
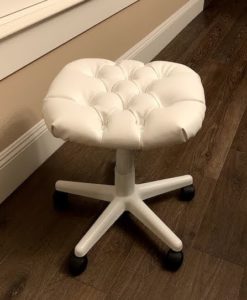
Now repeat that whole process for the seatback.
I also purchased Roller Blade Wheels from Amazon. Totally worth it! No need for a chair mat and I don’t have to worry about my wood floors getting damaged.

BLOOPERS
There were so many “firsts” for me on this project. So, there was a lot of trial and error.
But, the thing that made me want to cry was when I realized that I tufted the seat BOTTOM instead of the seat BACK. I totally thought I started with the seatback. But, it was the seat. I didn’t realize it until I went to screw it onto the chair.
Insert major meltdown here! It took me d-a-y-s to do this seat. And now I had to decide if I wanted to start over or, just leave it like that and do it again to the seatback. I screwed it into the chair, and it sat on it, and it felt fine. So, I sucked it up and started on the seatback.
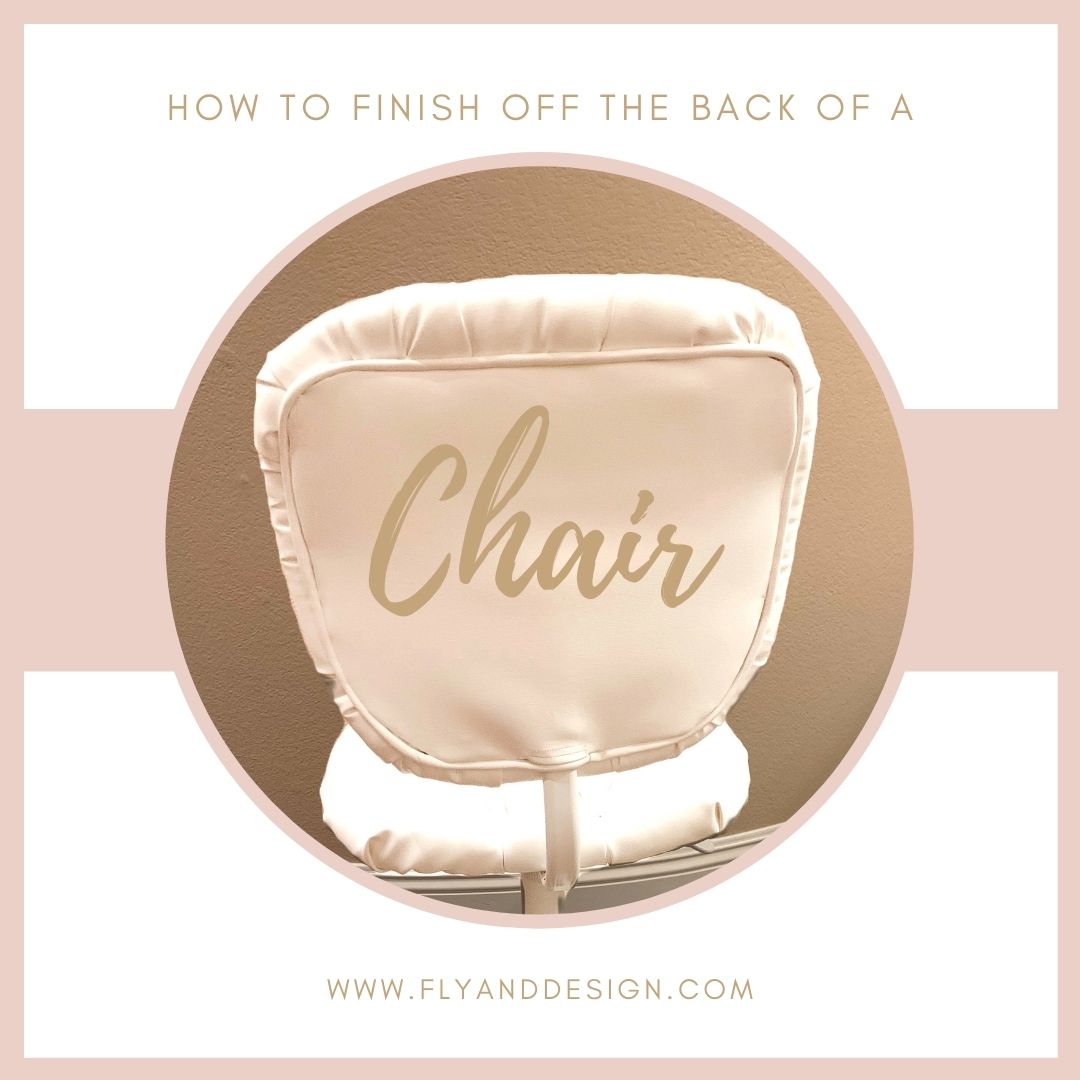
It took me a lot less time to do it this time, now that I knew what I was doing. But then I made a major blooper on the seatback. You may have noticed that I put the seat back on the chair upside down. I had to leave it because I didn’t realize it until I had already stapled the upholstery tack strip on it. That took forever, so I wasn’t about to rip it off and start over.
I learned a lot from this project. NEVER give up. I didn’t say never cry because that is okay in my book. Just get back up and keep going. I mean, look at this chair! It’s gorgeous!