How to Make a Burlap Wreath

This style of a wreath is very easy to make. It took less than 10 minutes. I purchased the 6″ wide burlap ribbon from Hobby Lobby when it was 50% off. The price has gone up over the last couple of years. The ones that I grabbed off the shelves in the ribbon aisle were $6.99. I had the cashier ring me up for one more while I was paying and got it from the end of the register. It was labeled $5.99.

I purchased the 2 1/2″ wired ribbon from Joanns with my 40% off coupon and 20% off the entire order. Gotta love a good deal. The wire wreath frame, pipe cleaners, and the wire came from the dollar tree. The whole project cost around $13.

Some of the links in this post are affiliate links. This means if you click on the link and purchase the item, I will receive an affiliate commission at no extra cost to you. All opinions remain my own. Please read my full disclosure for more info.

SUPPLIES

  • Wire Wreath Form 14″
  • Burlap Ribbon 6″ x 35″
  • Ribbon 2 1/2″ x 3 yards
  • Wire or Pipe Cleaners
  • Staples

TOOLS

  • Scissors
  • Lighter
  • Ruler
  • Stapler

HOW TO

Step 1

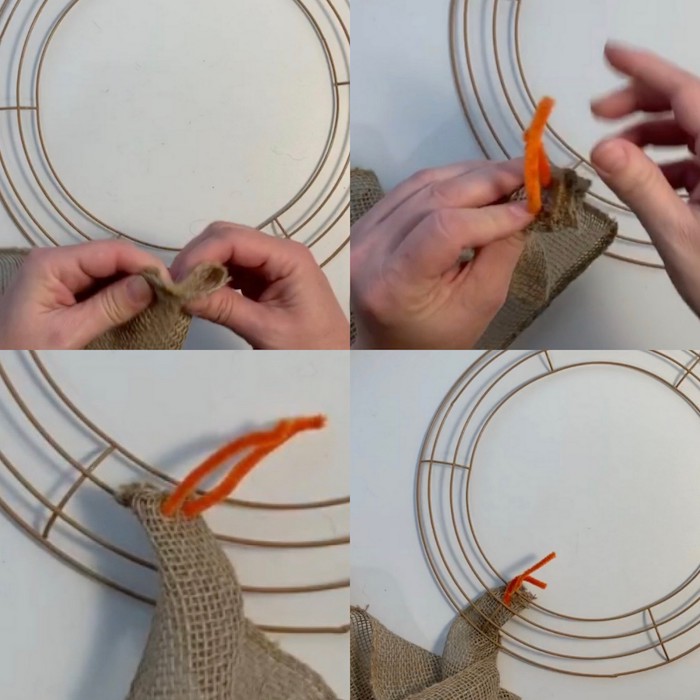
First, fold the end of the burlap ribbon in half. Then, in half again.

Next, pull the wire or pipe cleaner through the end.

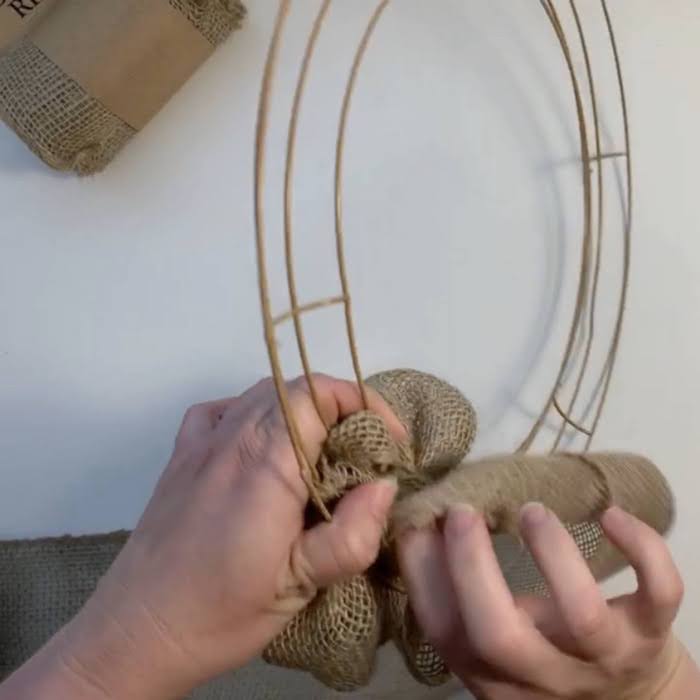
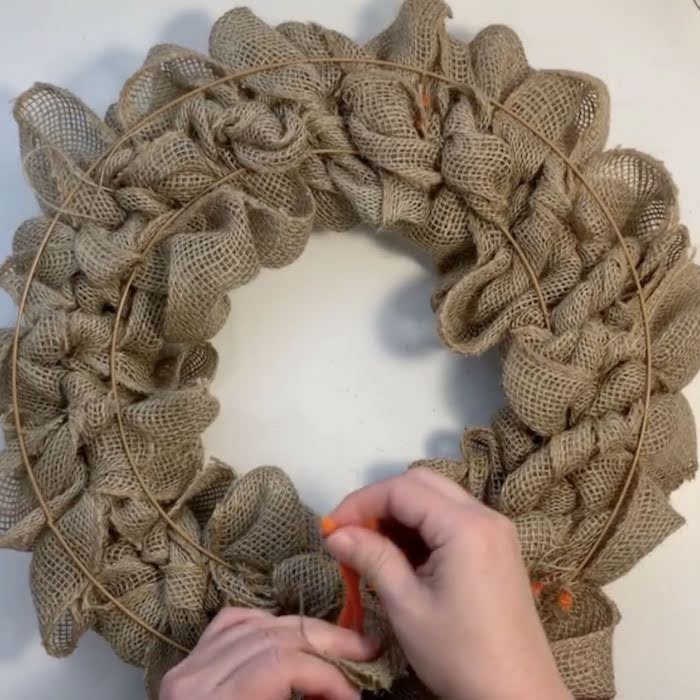
Using the wire, tie the burlap onto the wireframe. I like to tie it around one of the six wires that go from the center to the outside of the wreath.

Burlap collage

Step 2

Now, starting with the inner ring, pull a loop of burlap through.

The loop should be about four finger-widths long.

Pulling the burlap through the wire wreath

Step 3

Next, pull the burlap through the center ring and then the outer ring.

You should have three loops all about four finger-widths long.

(Stick your four fingers into each loop to measure.)

Four loops of burlap

Step 4

Once you have your three loops, push them over so that they gather.

gather burlap loops

Step 5

Turn the wireframe over and twist the tail of the burlap in the back about three times.

Twisting the burlap from the back

Step 6

Continue by pulling the burlap through the first ring again.

Repeat this two more times. Twist in the back.

Then, start from the first ring again and continue tow more times. You will now have pulled it through 3 columns of rows.

pull burlap through the wire wreath

Step 7

There should be three columns of 3 rows per section. The wire wreath is divided into six sections. Do this for every section.

ruffles

Step 8

Cut the excess burlap ribbon.

Cut the excess burlap ribbon.

Step 9

Use the wire or pipe cleaner to tie off the end of the ribbon, just like you did in the beginning.

Use wire to tie off the end of ribbon

Add a bow or accessory.

Keep your eyes peeled for step-by-step instructions for this easy cheat bow!!

Or, check out the Youtube video to see how I made the bow.

Burlap Wreath with ribbon
Burlap wreath hanging near front door

BLOOPERS

I didn’t have any bloopers. But, it took me forever to decide what kind of bow or accessory to add. 

Here are all the different things I tried. I was going to paint any of the wooden signs that I used.

But, as you can see, I ultimately went with a simple black bow.

Decorated burlap wreath